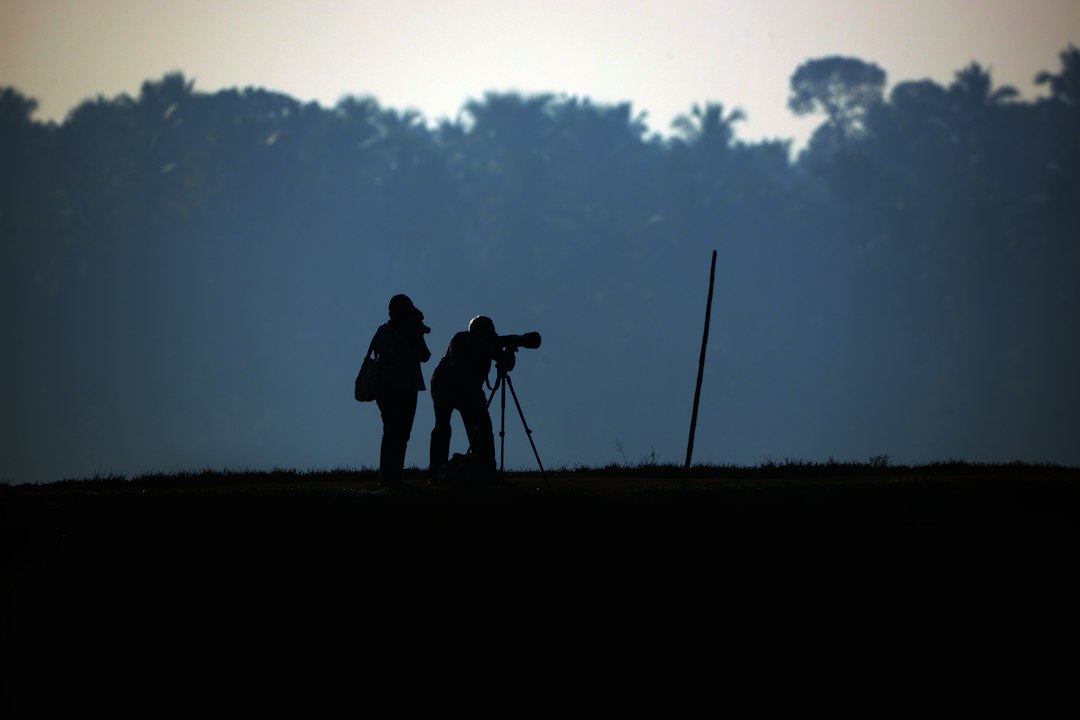
Few genres change how you see time the way long exposure photography does. With a slow shutter, moving water turns to silk, city traffic becomes glowing ribbons, and clouds draw lines across the sky. This complete, field-tested guide walks you through planning, gear, exposure, neutral density filters, focusing, composition, creative techniques, troubleshooting, editing, and equipment care so you can make images that feel intentional rather than accidental.
long exposure photography basics
At its core, a long exposure is any photo made with a shutter speed slow enough to record motion as blur. That might be 1/4 second for a fountain, 10 seconds for flowing surf, 30 seconds for starry skies with static foregrounds, or multiple minutes to flatten choppy seas and erase crowds. The exposure triangle still rules, but the knob you push furthest is shutter speed. Aperture controls depth of field and lens sharpness, ISO controls noise and dynamic range, and the shutter controls how motion appears. Once you decide how you want motion rendered, the other two variables and your filtration choices fall in line.
Two questions shape every decision. First, how much motion do you want to show? Blur length equals subject speed multiplied by shutter time. If cars move quickly, even 2-4 seconds will draw long trails; if clouds drift slowly, a minute may only paint subtle streaks. Second, how bright is the scene? Daytime light can be so intense that even f/16 and ISO 64 won’t allow a 30-second exposure without overexposure, which is why neutral density (ND) filters are essential tools for daylight work.
To keep your results consistent, lock down variables. Use a sturdy tripod and a remote release or a 2-second self-timer. Use base ISO for dynamic range. Shoot RAW to preserve highlight recovery latitude. Turn off in-body stabilization when the camera sits on a tripod to avoid micro-vibrations. If your camera offers a built-in intervalometer or bulb timer, learn it. The goal is a repeatable baseline: one where each change you make produces a predictable change in the look of motion.
Planning and safety in the field
Strong long exposures usually start before you leave home. Weather apps can forecast wind speed, cloud type, and tides; maps show where a river curves, whether a pier points west for sunset, or which overpass gives the cleanest view of traffic streams. A little planning avoids dead time and puts you where motion and light work together. For coastal scenes, check tide times and swell height. For city work, note rush hours and event nights. For mountains, watch wind direction because fast-moving high clouds can add dynamic streaks to otherwise static vistas.
Timing matters. Golden and blue hours add direction and color to light, while mid-day sun can create harsh contrast that requires careful filtration and bracketing. On overcast days, long exposures can simplify a scene into clean tonal masses; on windy evenings, even 15 seconds might push leaves into messy blur, so you’ll choose subjects that benefit from that energy—waves, grasses, clouds—over subjects where blur reads as distraction, like small tree branches close to the lens.
Safety and etiquette keep you making images for years. At the coast, never turn your back on waves; rogue sets show up. Keep gear above splash height and carry a microfiber towel and rain cover. In cities, be aware of traffic and local rules; set your tripod out of pedestrian flow and avoid blocking emergency access. At night, use a headlamp with a red mode to maintain your vision without blasting your neighbors. If you photograph in sensitive habitats, stay on durable surfaces and pack out everything you bring. The most compelling photograph isn’t worth damage to a place—or to your gear or yourself.
Essential gear and backup options
Tripod: choose one that stays steady in wind yet is reasonable to carry. Carbon fiber resists vibration better than aluminum at the same weight, and twist locks tend to be quieter and easier to clean than flip locks. Consider a hook under the center column to hang weight in gusts. For sand or riverbeds, spiked feet add stability; for boardwalks and rocks, rubber feet protect and grip.
Head and plate: a quality ball head or geared head with an Arca-Swiss compatible clamp makes leveling quick. A leveling base under a panoramic head saves time on uneven ground. Make sure every camera has a compatible plate; forgetting one plate can wreck a plan.
Filters: a circular polarizer controls glare and saturates color, a 3- to 6-stop ND is great for streams and waterfalls, and a 10-stop ND enables mid-day two-minute exposures. Consider a variable ND for flexibility, but note that some produce cross polarization artifacts at strong settings. For lens protection in salty spray, a clear filter can be faster to clean than the front element; remove it when it flares. Pack a graduated ND only if you like doing the balancing in-camera; modern RAW files plus careful exposure often make grads optional.
Accessories that prevent small failures: wired remote with lock, extra batteries (long exposures and cold deplete them quickly), lens cloths and pre-cut tissues for salty water, a small rocket blower, gaffer’s tape for light leaks around viewfinders or adapter seams, and a garbage bag or rain cover to shield the camera between waves. If your camera supports USB-C power, a power bank can extend a night under stars.
Backup options matter. If the main tripod fails, a small clamp with an Arca plate can mount the camera to a railing. If filters crack, you can stack a polarizer and a modest ND to approximate a stronger one. If a remote dies, your camera’s self-timer or smartphone app can fire the shutter. Redundancy saves nights.
Exposure settings: shutter, aperture, ISO
Decide the motion first. If you want waves to look like mist, 20–60 seconds usually works; for rivers where you want to keep texture, 1/2 to 2 seconds can retain streaks without turning everything to fog. For traffic trails, 4–15 seconds can be enough to draw ribbons; for giant cloud streaks, aim for 30 seconds to several minutes depending on speed.
Build a baseline like this for daylight water scenes:
- ISO 64 or 100
- Aperture f/8 to f/11 (sharpness and depth)
- Shutter speed determined by ND filtration to achieve desired blur (e.g., 15 seconds)
At night, depth of field and star rendering change the recipe. For static stars with foreground, keep shutter under the “500 rule” equivalent (better yet, use modern calculators that consider pixel pitch), often 10–20 seconds with wide lenses. If you want star trails, push beyond a few minutes, or blend many shorter frames in post. Aperture wide open can soften corners and reduce depth, so weigh the trade-off or stop down slightly and raise ISO as needed.
Metering can get tricky when you stack dense ND filters. Many cameras underexpose in extreme darkness. Try test shots without filters to establish base exposure, then apply the ND factor using a chart or an app. For example, if your base shutter is 1/30 at f/8 ISO 100 and you add a 10-stop ND, a one-second exposure becomes roughly 33 seconds. Bracket subtly around your calculated time; a small shift in exposure often changes the mood.
Using neutral density filters without headaches
Filter math is straightforward in theory but fiddly in wind and spray. Reduce friction with a repeatable process:
- Compose and focus without the ND in place. Lock focus (use manual focus or back-button AF) so the camera won’t hunt in the dark.
- Set exposure for the scene without ND to get a clean histogram. Note the shutter time.
- Calculate the new shutter time after adding the ND. A 6-stop ND multiplies time by 64; a 10-stop multiplies by 1024.
- Mount the ND, shield the lens from stray light with your hand or a hood, and start the exposure using a remote or timer.
Light leaks can ruin very long exposures, especially on film-era bodies or with adapters. Tape the viewfinder shutter, cover the lens mount seam if you are stacking filters, and shade the entire front assembly from side light. With variable ND filters, avoid the last 10–20% of their range to reduce color shifts and X-pattern artifacts. If color shifts still appear, set a custom white balance or shoot a gray card for reference. RAW gives you room to correct, but fixing large cross-polarization patterns is tedious, so prevention is better.
Cleaning matters. In sea spray, a thin film builds up fast and turns into flare. Rinse with clean water (spray bottle) and dry with soft tissues; then polish gently with microfiber. Avoid circular motions with salt crystals; drag them off the glass in straight swipes first. Keep one cloth just for water and another for final polish.
Focusing and sharpness when it’s dark
Autofocus struggles through dense ND or at night. Use these options:
- Prefocus: focus without the ND, switch to manual focus, then mount the ND.
- Hyperfocal: stop down to f/8–f/11 and focus at a point roughly a third into the scene for landscapes, or compute true hyperfocal with an app if precision matters.
- Live view magnification: in low light, magnify stars or a distant light to nail focus manually.
- Contrast aids: a small flashlight on your foreground can give AF something to grab, then switch off.
To keep things crisp:
- Mirrorless silent shutter modes can introduce rolling artifacts with artificial lights; use mechanical or first-curtain modes for safety when possible.
- Wind blur looks like softness; lower the tripod, spread legs fully, hang weight, use a lens hood as a tiny windbreak, and time exposures between gusts.
- Thermal shimmering above hot surfaces (e.g., roads after sunset) softens long telephoto frames. Let the air cool or choose wider lenses.
- Diffraction grows at tiny apertures; f/16 is fine on many modern sensors for landscapes, but avoid f/22 unless you need a strong sunstar and accept the softness trade-off.
Finally, review at 100% on the back screen for a quick reality check. Zoom into key edges and high-contrast transitions. If they look mushy, find the culprit before you commit to a series of long frames.
Composition and storytelling with motion
Motion is a design element. Ask what the blur should do in the frame. Water streaks can lead the eye, traffic trails can frame architecture, and cloud bands can echo landforms. If everything moves the same way, the scene may feel flat; contrast moving and static elements to build rhythm. For example, a solitary rock against smooth surf creates a calm focal point, while converging car trails under a city bridge add tension and direction.
Use foreground anchors. In long exposures, textures simplify, so an anchor—rock, pier piling, sculpture, tree—gives scale and a resting place for the eye. Place it along rule-of-thirds lines or use leading lines to connect it to distant shapes. Negative space becomes powerful when water and sky smooth out, so don’t fear large simple areas if they balance the frame.
Color and light matter as much as blur. Blue-hour city scenes lean cool; a splash of warm window light or a red taillight trail adds complementary contrast. On the coast, a warm afterglow inset against cool, silky water feels serene. Consider how light sources move during your exposure: a rotating beacon or blinking navigation light can create dotted patterns; decide whether those support or distract from your story.
Before firing the multi-minute frame, make a quick sketch exposure at high ISO and a shorter shutter to verify composition, horizons, and edge intrusions. It’s faster to fix a crooked horizon at the start than after a five-minute sequence.
Creative techniques: light trails, safe steel alternatives, and ICM
Light trails: elevated city views, bridges, or curves in the road turn cars into flowing ribbons. For clean trails, wait until twilight when ambient light lifts shadows but headlights are still bright. A starting point is ISO 100, f/8, and 8 seconds. Shorter times draw dotted lines from blinking lights; longer times merge flows into continuous color. Try framing where two roads cross for layered patterns. Use a polarizer sparingly at night; it can increase required exposure without much benefit.
Steel wool alternatives: spinning burning steel can start fires and send sparks into delicate environments and gear. Safer creative options deliver similar energy without ignition. Try programmable LED poi, a simple light rope, or a pixel whip in a wide-open space free of bystanders. Spin or wave the light during a 5–20 second exposure to draw arcs; vary speed to change line density. Emphasize safety: pick nonflammable settings, keep water nearby, and avoid windy conditions. If in doubt, skip the spin and look for ambient urban motion—ferries, amusement rides, or illuminated fountains.
Intentional camera movement (ICM) blurs the world by moving the camera during exposure. Start with 1/2 to 2 seconds, a narrow aperture, and ISO 100. Pan upward through tall trees for vertical brushstrokes, or sweep laterally across a surf line for abstract bands. The trick is rhythm: steady motion from start to finish rather than a jerk at the end. Use multiple takes with small variations to discover patterns you like.
Troubleshooting common problems
Problem: washed-out highlights even with ND.
- Solutions: reduce exposure time, stop down, lower ISO, or wait for softer light. Consider bracketing and blending highlight-protected frames with motion-rich frames in post.
Problem: banding or color cast with variable ND.
- Solutions: avoid the strongest portion of the filter’s range, rotate just shy of maximum, or switch to fixed ND filters. Correct residual color with a custom white balance or in RAW processing using the calibration panel.
Problem: blurred corners despite mid-range apertures.
- Solutions: verify focus isn’t drifting, turn off stabilization on tripod, shield from wind, and check for filter stack flex. Cheap step-up rings can sag; choose solid adapters.
Problem: light leaks during multi-minute exposures.
- Solutions: use a viewfinder cover/shutter, tape seams, shade the lens, and check for tiny gaps between stacked filters. Some mirrorless bodies still leak through ports; a small piece of opaque tape over indicators helps during long bulb shots.
Problem: salt spray flare halos.
- Solutions: clean frequently, use a hood, change your angle to minimize direct light, and consider a clear sacrificial filter to wipe quickly during sessions.
Problem: noisy files at night.
- Solutions: expose to the right without clipping highlights, use base ISO where possible, and keep sensor temps down by spacing out multi-minute exposures. Long exposure noise reduction (LENR) can help but doubles time; decide per project whether the benefit outweighs the wait.
Post-processing workflow: keeping it natural
Start with a consistent RAW workflow. Set white balance based on a neutral target or a reliable part of the scene; move temperature/tint together until water, clouds, and neutral structures look believable. Pull exposure and highlights to recover tone in bright foam or street lamps, lift shadows modestly, and set the black point so the image holds shape without crushing detail.
For water and sky, clarity and texture sliders can quickly go too far. Try negative clarity/texture in large, feathered masks to keep the “silk” clean while leaving edges, rocks, or architecture crisp. Dehaze can deepen color bands at blue hour, but keep an eye on shadow noise. If long ND exposures warmed the file, use the calibration panel or a targeted HSL approach to neutralize color cast without flattening overall warmth.
Perspective and horizon corrections are part of the craft. Use guided transforms to straighten piers and buildings, then crop for balance. For star trails built from short frames, stacking software allows controlled blending; for blended city scenes, paint together a highlight-protected base with a frame containing the best light trails. Avoid halos by keeping masks soft and edges aligned.
Sharpening is last. Apply global sharpening lightly and add detail only where it matters—on static features, not on motion. Export at reasonable sizes for your platform and keep a master file with layers or a sidecar so you can re-interpret later with fresh eyes.
Maintenance and longevity of your kit
Salt, grit, and moisture are constant companions around water and winter roads. Back at home, wipe tripod legs with fresh water and dry fully before collapsing. Disassemble twist locks occasionally, remove sand, and relube lightly with manufacturer-approved grease. For flip-lock legs, tighten screws just enough to eliminate slip without binding.
Filters deserve care. Rinse salt, dab dry, and store in soft pouches. Don’t leave dense NDs mounted in hot cars; laminated units can separate over time. For variable NDs, periodically check that front and rear rings don’t wobble; tiny play shows up as softness during long exposures.
Cameras need a routine. Clean sensor dust with a blower first; if spots persist, use proper swabs and fluid following your manufacturer’s guidance. Keep weather seals healthy by inspecting rubber gaskets around battery doors and ports. After rain or sea spray, remove batteries and cards, open doors, and let the body air dry at room temperature before sealing it back up.
Finally, maintain your workflow. Back up cards to two places before formatting, label finished shoots clearly, and archive both RAWs and processed exports. Replace worn cables, remotes, and plates before they fail on location. A little attention between shoots keeps the field work focused on craft rather than repair.
Field checklists you can trust
Pre-trip:
- Forecasts/screenshots: tide, wind, cloud cover, sun/moon times
- Maps/pins: access, safe parking, compositions, alternates
- Permissions: check local rules, construction closures, events
Gear:
- Camera + spare body if critical
- Lenses: wide (14–24mm or 16–35mm), normal (24–70mm), tele if needed
- Tripod + head + plates + spiked/rubber feet
- Filters: CPL, 3–6-stop ND, 10-stop ND, cleaning kit
- Remote release, extra batteries, power bank, headlamp (red mode)
- Rain cover, towel, gloves, hat, layered clothing
On-site:
- Compose and prefocus without ND
- Set base exposure, calculate ND factor
- Cover light leaks, shield from wind
- Test exposure at high ISO for framing
- Run the long frame, review critical edges, adjust
Ethics and working with the environment
When motion is your canvas, the place is your studio. Respect tides, vegetation, and wildlife. Stay on durable surfaces, avoid trampling plants for a lower angle, and step back if nesting birds react to your presence. In urban areas, respect private property and security requests. Avoid shining bright lights into homes and cars while composing or painting with light. Your footprint should be minimal; your images should feel like a conversation with the place, not a conquest.
Project ideas to build your style
A few structured exercises can accelerate learning:
- One spot, four seasons: commit to the same composition at different tides, winds, and skies. Learn how motion length and direction shape mood.
- Speed series: photograph the same stream at 1/4s, 1s, 4s, 15s, 60s, then compare which feels right for story and texture.
- City grid: map five intersections with layered traffic and make pairs at twilight and at night to explore ambient-to-trail balance.
- Cloud study: pick a hill with a clean horizon and test how 10s, 30s, 2 min, and 4 min alter sky geometry on different wind days.
Each project turns guesswork into intuition. Once you see how time translates to lines and shapes, you’ll start designing outcomes rather than hoping for them.
Further learning and next steps
As you refine your process, keep notes. Jot the shutter times, wind speed, filter density, and what you liked or didn’t about the blur. Build a personal table of “looks” for streams, surf, clouds, and traffic so you can pick settings quickly on location. Study photographers whose work balances motion and stillness in ways you admire, then reverse-engineer how long the exposure likely was and why that choice served the story.
To explore more technique articles, walkthroughs, and case studies, visit Art Havens. Use these principles, then bend them when it serves the frame in front of you. Long exposures reward patience, curiosity, and small, repeatable habits that make time visible—on your terms.