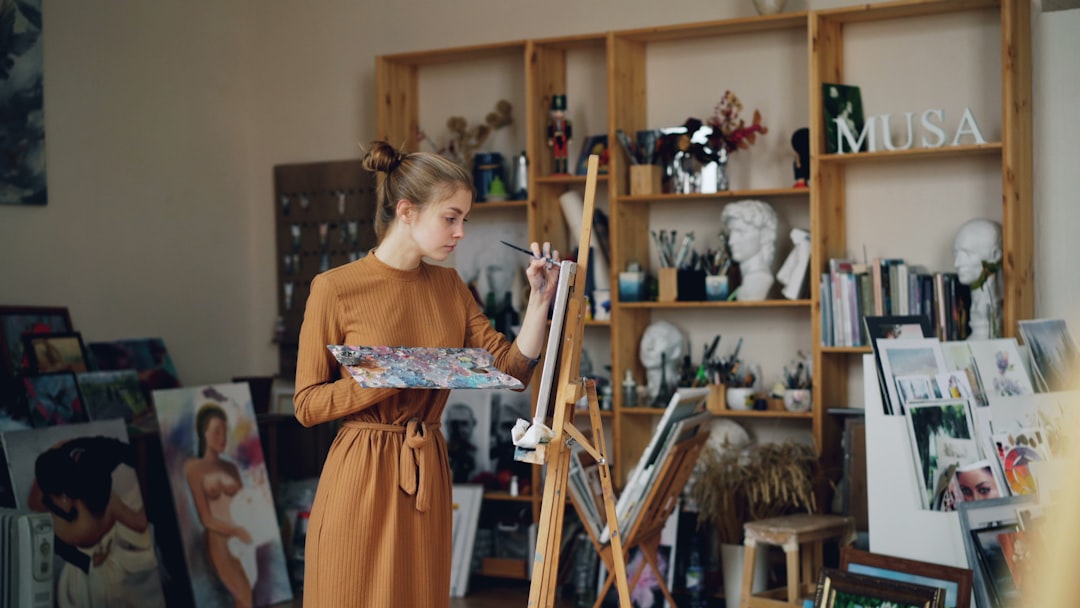
If you’ve been waiting for the “perfect” loft or giant spare room before you start making, skip the wait. A well-planned home art studio setup can live in a corner, a closet, or a reclaimed garage bay and still give you clean light, predictable workflow, and room to grow. This guide walks through the practical pieces that matter most: understanding your space, zoning it for making and cleanup, choosing trustworthy lighting, moving air, organizing supplies, controlling sound and mood, and building it all on a budget that fits your life.
What you really need from a studio: function before furniture
Artists often start with furniture shopping, but function comes first. A studio is not a couch; it’s a tool that supports repeatable work. Begin by writing three short lists: the media you use (graphite, watercolor, acrylics, oils, clay, printmaking), the typical size of your work (A4 sketchbook, 24×36 canvas, miniature jewelry pieces), and your process steps (gather, sketch, block-in, refine, dry, pack or photograph). These lists define requirements more clearly than any catalog spread.
Translate the lists into needs:
- Surface needs: easel or wall, flat table, cutting mat, rotating stand, photo backdrop
- Environmental needs: steady color temperature, adjustable brightness, ventilation, dust control
- Movement needs: short reach for tools, clear path to sink, drying shelves you won’t bump into
- Storage needs: hot storage (within arm’s reach), warm storage (used each session), cold storage (infrequent), archival storage (finished works)
Once you map needs, furniture becomes a solution to specific problems. A foldable drafting table makes sense if you must reclaim the room at night. A wall-mounted French cleat rail makes sense if you switch between paper, canvas, and camera weekly. Function, then form.
Try a mindset shift too: instead of thinking “this is my studio,” think “this is a workflow I can rearrange.” When you treat the room as an adaptable workflow, you’ll choose elements that scale, not objects that lock you in.
Room-by-room options for home art studio setup
Studios grow in all kinds of spaces. Each option has trade-offs, and knowing them up front helps you plan fixes before frustration sets in.
Living room corner
Pros: easy access, often the brightest room, social if you share space. Cons: visual clutter spills into shared life, limited permission for fumes or dust.
- Fixes: use a foldable standing desk as a hybrid easel/table; add a rolling cart with a fitted cover; hang a curtain or shoji screen to hide works in progress; rely on water-based media or low-odor options and a box fan with filter for control.
Bedroom wall
Pros: privacy, predictable light schedule, quiet. Cons: textiles collect dust, some mediums are unsuitable.
- Fixes: mount a French cleat strip at 66–72 inches to hang boards, canvases, and tool panels; keep a lidded under-bed bin for finished pieces; choose sealed containers; add a compact purifier and wipe surfaces weekly.
Closet conversion
Pros: contained, easy to hide, strong focus cues. Cons: heat buildup, low air movement, narrow depth.
- Fixes: remove the closet rod, add a 20–24-inch-deep worktop, mount LED strip lights under shelves, install a quiet desk fan for airflow, and keep any strong-smelling materials elsewhere. Use shallow drawers for tools and a pegboard on the back wall.
Garage bay
Pros: mess-friendly, straightforward ventilation, space for large work. Cons: temperature swings, dust, pests.
- Fixes: create a clean zone with interlocking foam tiles, hang plastic sheeting or canvas drop cloths as a dust curtain, add insulation panels if possible, and keep a sealed cabinet for papers and canvases. Use task lighting to overcome dim garages.
Attic or loft
Pros: isolation, inspiring views, storage volume. Cons: sloped ceilings, heat near roof, long trips to sink.
- Fixes: set work height at the tallest area, install reflective blinds or films to manage heat, use a portable utility sink if plumbing is distant, and keep a stair-safe cart for moving works.
If you want more design inspiration and practical art-life guides, explore resources at Art Havens for ideas that fit different homes and budgets.
Zoning your space: make, move, dry, clean
Most studio frustrations come from collisions: a wet canvas meets the cat, a craft knife meets your elbow, a pastel smears on yesterday’s sketch. Zoning helps you avoid those collisions. Think in four zones and arrange them along a U or L path so that work naturally flows forward without backtracking.
- Make zone: your primary surface. For 2D work, combine an easel or wall rail with a flat table. For 3D, a sturdy bench at hip height. Keep only “hot” tools here—what you use every 10 minutes.
- Move zone: a side shelf or cart for items you rotate in and out: pigment sets, palettes, sketchbooks, clamps. A shallow shelf beats a deep one; you see everything at a glance.
- Dry zone: vertical drying rack or hanging rail with binder clips; for paper, a wire shelf; for canvases, a narrow shoe rack can stand in. Label slots with painter’s tape to avoid mix-ups.
- Clean zone: trash, recycling, rags, a sealed jar for brush rinse materials, and access to a sink or a water cart. Keep soap, scraper, and brush spinner nearby.
Test your zones by doing a one-hour session and tracking steps. If you twist, reach, or put something on the floor more than twice, that item needs a new home. Small changes like a magnetic tool strip, a raised brush bath, or a paper dispenser save thousands of micro-movements across a month.
Light you can trust: daylight, fixtures, and color
You make visual decisions; light is your truth source. Aim for two things: consistent brightness and neutral color. Daylight is wonderful but inconsistent. You can anchor it with a layered lighting plan.
- Ambient layer: soft, even light that fills the room. LED panels or dome-style fixtures work well. Choose LEDs with a high CRI (90+) and a neutral color temperature (around 5000K) so whites look white and reds don’t swing orange.
- Task layer: directional light for the work surface: swing-arm lamp, slim bar, or track heads on a dimmer. Place task lights so they graze across texture rather than blast straight on; you’ll see brushstrokes and fibers.
- Control layer: dimmers, separate switches for task and ambient, and blackout curtains or shades so you can standardize light for color-critical work or photographing.
Sidelight (from the left if you’re right-handed) reduces your own shadow. If your space only allows downlight, add a secondary task lamp at a shallow angle. Avoid cheap bulbs with strong blue spikes; they distort pigment choices. When in doubt, bring a color checker or a known white sheet into the studio and test under your lights; adjust until it looks neutral at different times of day.
Pro setup tip: If you frequently photograph work, plan a dedicated photo “station” with two identical continuous lights at 45 degrees to the artwork and a neutral backdrop. Consistency matters more than price. Even two matching desk lamps with identical bulbs and a foam board diffuser can give you a repeatable look.
Air and materials: working clean with paints, solvents, and dust
Comfort and common sense go a long way. Move air when you introduce fumes or dust, capture particles close to the source, and label what could harm kids or pets. Different media call for different habits; choose what fits your practice and local rules for disposal.
- Ventilation basics: a box fan in a window facing out creates negative pressure. Add a furnace filter to the intake side to catch particles. For garages, an inline duct fan with a window insert is tidy and quiet.
- Solvent discipline: if you use low-odor mineral spirits or similar, keep a lidded brush-washing jar and close it between rinses. Store them in a metal cabinet or a sealed tote. Rags should live in a metal container with a tight lid to reduce fire risk.
- Dust control: wet-sand instead of dry when possible. For pastels and charcoal, a drafting table with a front lip reduces floor fallout; a handheld HEPA vacuum handles the rest. Wear a dust mask during sanding or heavy pastel sessions if particles are visible in the air.
- Labeling and storage: write medium name, notes, and date on masking tape stuck to bottles and jars. Future you will be grateful, and guests will know to leave marked containers alone.
Comfort also matters: hydration within reach, a small fan for heat, a sweater for the cold, and an anti-fatigue mat if you stand for long sessions. Tiny quality-of-life upgrades extend your productive window without expensive gear.
Surfaces and floor care: tables, easels, and walls
Your work surface sets posture and precision. Match heights to your media and body. Standing at an easel frees shoulders for sweeping strokes; a stool at a drafting table supports detailed work with forearms anchored. Aim for forearms near level with the surface for control without strain.
- Easels and walls: If you lack room for a floor easel, mount two vertical 1×3 rails to the wall and use sliding clamps or a cleat board to hold canvases and panels. A wall rail doubles as a drying zone and a critique station.
- Tables: In small rooms, use a foldable drafting table (24–30-inch depth). Top it with a large cutting mat that acts as a sacrificial surface and gives you a grid for measuring.
- Secondary surfaces: A small side table for palettes or a keyboard tray for brushes keeps your main surface clear. A lazy Susan board is brilliant for small sculptural work.
- Floor protection: Canvas drop cloths are cheap but shift underfoot. Interlocking EVA foam tiles or vinyl mats are easier to sweep and kinder to dropped charcoal or blades.
Establish a “no floor” rule for active pieces: nothing sits on the ground where it can be kicked or stepped on. A narrow vertical rack saves more space than any horizontal shelf if you work with multiple canvases.
Power and digital companions: cameras, tablets, and backups
Even if your art is purely analog, a small digital stack helps with references, documentation, and sharing. Plan where cables run before they trip you.
- Outlets and routing: Use a power strip with a master switch mounted under the table’s front edge. Route cables along the underside using adhesive clips, and drop a single cord to the wall to keep feet clear.
- Reference screen: A small monitor or tablet on a swing arm leaves the table open. Keep its color profile neutral and its brightness similar to your task light.
- Camera and copy stand: A smartphone on a boom arm above the table is enough to record timelapses or snap progress. If you photograph finished work, a DIY copy stand (two lights at 45 degrees and a vertical mount) plus a neutral background works well.
- Backups: Sync sketch photos to a cloud folder and a portable drive. When a piece leaves the studio, your record should already exist.
Shield tech from splashes and dust: a clear acrylic guard attached to the back of your desk stops errant droplets, and a zip bag over a keyboard during messy work saves cleanup.
Storage that saves time: modular systems, labels, archival care
Time lost searching is momentum you rarely get back. Build storage around frequency of use and visibility. Label everything the moment it enters your studio—future decisions get easier when the home is obvious.
- Hot storage: The tools you touch every 10–15 minutes. Use a desk caddy, magnetic strip, or shallow drawer divided with foam or wood spacers. Label each slot.
- Warm storage: Things you need each session but not every minute: pigment sets, tape, palette knives, spare leads. A rolling cart with three shallow trays is perfect; keep one tray per medium.
- Cold storage: Infrequent items: backup paper, spare canvas, bulk mediums. Clear bins with printed labels stacked on a metal shelf let you see inventory instantly.
- Archival storage: Finished work deserves protection: acid-free sleeves for paper, corner mounts for boards, glassine interleaves, and rigid boxes. Keep this off the floor and away from exterior walls if the room gets humid.
Adopt two habits: run a five-minute reset at the end of each session, and set a quarterly audit. If a tool leaves its slot twice in a row, that slot is wrong; redesign the layout instead of blaming your memory.
Sound, mood, and boundaries: rituals that protect your flow
Studios do more than hold tools; they hold attention. Create repeatable cues that tell your brain it’s time to make. Some artists switch on the same playlist. Others tie on an apron, light a single lamp, or start with a two-minute warmup sketch. The specific action matters less than its consistency.
- Sound: Decide whether you need music, silence, or environmental noise. A small speaker on a shelf keeps your table clear. If family or roommates share walls, soft rubber feet under tables reduce vibration and thumps.
- Smell: Avoid heavy scents that can mislead perception or irritate; a mild studio soap for cleanups is enough and won’t linger.
- Boundaries: In shared homes, hang a simple “in session” sign. If your studio is also your living room corner, a screen or curtain helps others see the boundary—and helps you feel it.
- Posture and breaks: A timer that nudges a quick stretch every 30–45 minutes supports hands and back. Better art happens when your body is okay.
Keep a “win wall”: a cork board or magnet strip that displays one thing you like from each week. It anchors progress, especially when big pieces take time.
Budget and timeline: three build plans
Good studios emerge from constraints. These build plans scale from an afternoon refresh to a robust garage or loft build. Each assumes you already own your core creative tools; the cost is for studio infrastructure.
Weekend refresh (about $150–$300)
- High-CRI LED task lamp and a dimmable bulb for ambient light
- Large cutting mat, two tool caddies, magnetic strip
- Rolling three-tier cart and labels
- Vinyl mat for the floor (or interlocking tiles if on sale)
- Binder clips, painter’s tape, and a wall rail (or two screws and a cleat board)
Result: Better light, obvious tool homes, a modest drying rail, and a floor you can tidy in minutes.
One-room reset (about $600–$1,200)
- Two LED panel lights and a swing-arm task bar with dimmers
- Foldable drafting table and a compact wall-mounted easel rail
- Metal shelving with clear bins for cold storage
- Interlocking EVA tiles for the work area and a small HEPA purifier
- Power strip with master switch, cable routing, and a tablet arm
Result: A full workflow: make, move, dry, clean—with predictable light and smart storage.
Garage or loft build (about $1,500–$3,500)
- Insulated partition or curtain track to create a clean zone
- Ceiling track lights with CRI 95+ and zoning switches
- Sturdy bench, wall cleats, and a vertical drying rack
- Inline exhaust fan with window insert and an upgraded HEPA purifier
- Lockable metal cabinet for any strong-smelling materials and archival boxes for finished work
Result: Space for larger pieces, reliable airflow, and durable storage that protects materials year-round.
Upkeep and evolution: maintenance and seasonal tune-ups
Studios thrive on rhythm. Set two recurring appointments: a weekly reset and a quarterly tune-up. Keep them short and consistent so you actually do them.
- Weekly reset (20 minutes): Restock rags and paper towels, empty the trash, wipe the table, rinse jars, sharpen or refill tools, and return outliers to labeled homes. Update the to-do list for tomorrow’s session so you start hot, not cold.
- Quarterly tune-up (90 minutes): Pull every bin, box, and drawer. Cull dried mediums, bent blades, and gummed-up tape. Re-label anything that made you hesitate. Check lights, fans, and power strips. Note what you actually used and demote the rest to cold storage—or donate.
Seasonal shifts call for tweaks: thicker rugs or slippers in winter, a fan or reflective film in summer. If your studio shares space with family life, align the tune-up with household milestones—new school term, holidays—so everyone understands the boundary reset.
Case studies: three real-world footprints
Micro apartment corner (5×6 feet)
One foldable drafting table against a window wall, a swing-arm task bar, and a three-tier cart tucked under the table. A wall cleat holds boards. Interlocking tiles mark the studio footprint; when company comes, the table folds and a curtain hides the gear. Media: watercolor, ink, gouache.
Why it works: The footprint is clear, light is predictable, and the cart is the brain of the studio—each tray is a separate medium. The curtain cue helps the artist switch into “studio mode,” even in a living room.
Spare-closet studio (depth 24 inches)
Closet doors removed. A laminated shelf becomes the work surface, with an LED strip under each storage shelf above. A desk fan moves air. Pegboard on the back wall holds tools, while shallow drawers keep paints visible. A copy stand arm clamps to the shelf for overhead photos. Media: mixed media on paper, small panels.
Why it works: The vertical layering is intentional: light at the top, tools mid-level, work at arm height, and drawers below. The pegboard keeps the “hot” set visible so time isn’t lost opening drawers.
Garage bay (single car width)
A clean zone is set with vinyl mats and a curtain track to block dust. Two 5000K LED panels provide ambient light; track heads on a dimmer add task lighting. A vertical drying rack stands near the wall; a lockable cabinet holds any strong-smelling materials and a HEPA purifier runs when sanding. Media: acrylics, oils, primed canvas rolls.
Why it works: The curtain creates an easy boundary between car life and studio life. The airflow plan is simple and reliable. The drying rack gives pieces “homes” so they don’t migrate to the floor.
Common mistakes and gentle fixes
- Buying storage before planning zones: Map a one-hour session and place tools where your hands already reach. Then buy storage that fits the map.
- Relying on daylight alone: Add a neutral, high-CRI task lamp and a dimmer so color stays predictable.
- Deep shelves that hide tools: Swap for shallow trays, labels, and vertical storage; you should see everything at a glance.
- No drying plan: Install a wall rail with clips or a narrow rack; label slots so you always know what’s safe to touch.
- Letting the floor become a table: Create a “parking” shelf for items waiting for the next step. The floor is not a step.
- Cable spaghetti: Mount a power strip under the front edge of the table; route cables along the underside with clips and drop a single cord to the wall.
- Inconsistent cleanup: Set a 5-minute end-of-session timer. It is small enough to do and big enough to change tomorrow.
A simple setup checklist you can print
- List media, typical sizes, process steps
- Sketch zones: make, move, dry, clean
- Choose light: CRI 90+, around 5000K, separate ambient/task, dimmers
- Plan air: fan out, filter in, lids on jars, labels on anything that smells
- Pick surfaces: wall rail or easel, flat table with cutting mat
- Protect floor: EVA tiles or vinyl mat
- Route power: mount a master-switch strip, cable clips, one wall cord
- Assign hot/warm/cold/archival storage and label it
- Create ritual cues: apron, timer, playlist, “in session” sign
- Schedule weekly reset and quarterly tune-up
Bring it together
You don’t need a warehouse to work like a pro. You need clear zones, honest light, air that moves when it should, tools where your hands expect them, and a few habits that protect your attention. Start small if you must—one lamp, one cart, one rail—and let the studio evolve as your work evolves. The most dependable studios reflect their artists: intentional, resourceful, and quietly ready for the next session.