Exploring Different Lighting Techniques for Stunning Photography
Lighting is critical for creating a stunning photograph. You can have the best camera and the most expensive lens, but if your lighting isn’t right, you won’t be able to capture the shot you’re looking for. That’s why it’s important to take the time to explore different lighting techniques and find the right one for your photo.
In this guide, you’ll learn all about the basics of lighting in photography, from natural lighting techniques to artificial light sources. We’ll cover the art of capturing light rays, how to adjust color temperature and white balance settings, lens choices for different types of lighting, how to set up a photograph for effective lighting, and more.
By the end of this guide, you’ll have a better understanding of the range of lighting techniques available for photography and be able to create stunning photos with ease!
Research Overview
Photography is a powerful tool for capturing images that speak to the viewer on a deeper level. Utilizing different lighting techniques is one of the key tools in creating stunning imagery. In order to take full advantage of those techniques, it’s important to first understand the existing research related to lighting and how to use it in photography.
Many different resources exist that help photographers understand the basics of lighting and how to manipulate it for different results in their photos. There are books, websites, blogs, and magazines filled with tips, tricks, and advice on how to use lighting correctly. Even studying the work of well-known photographers can give an understanding of the impact that good lighting can have on a photograph.
By taking the time to educate yourself on the topic, photographers will be better equipped to apply these techniques to their own work. Whether exploring natural light outdoors or mastering studio lighting indoors, the right knowledge and guidance will pave the way to creating stunning photos.
Exploring Natural Lighting Techniques for Amazing Photography
Shooting photographs with natural lighting is a great way to capture stunning images without relying on the use of artificial light sources. Different techniques can be used to create interesting and unique photos with natural lighting, such as directional lighting, ambient light, and backlighting.
Directional Lighting
Directional lighting involves using a single light source to light up a subject, usually from one side. This type of lighting is excellent for creating dramatic effects that can make a photo more dynamic and dramatic. To achieve the best results with directional lighting, it is important to move the light source around the subject in various directions to produce different results.
Ambient Light
Ambient light refers to the natural light available in any given environment. This type of lighting can be used to create softer, more muted shots. It’s also great for creating an even, soft light on the entire scene which can result in more natural, subtle images.
Backlighting
Backlighting is when the light source is behind the subject, which creates a glow effect. This type of lighting can be used to create stunning silhouettes and draw the viewer’s attention to particular elements in the scene. It can also help to enhance texture in photos and make them more visually appealing.
When using natural lighting techniques in photography, it is important to be mindful of the time of day, weather conditions, and other environmental factors that may have an effect on the quality of the photograph. With the right technique and preparation you can explore endless possibilities with natural light.
Exploring Artificial Light Sources
Artificial light sources for photography can include anything from flash to studio strobes. Utilizing these light sources can help enhance your photography, by adding drama and texture, or creating brighter images with more depth. Understanding the key elements of working with artificial light sources will allow you to create stunning photographs.
Light Modifiers
Light modifiers are a great way to manipulate light and produce interesting effects. Some popular light modifiers include softboxes, strip boxes, umbrellas, and reflectors. They can be used to soften light, produce intense highlights, and create directional light. It is important to understand what each light modifier is capable of so that you can accurately control the quality of light for your photos.
Speedlights
Speedlights are small flash units that can be attached to the camera’s hot shoe mount. They offer flexibility for shooting in different types of environments and can be used as fill-in lights, background lights, or main lights. Speedlight strobes are usually powered by batteries so they are relatively portable and easy to use.
Studio Strobes
Studio strobes are a type of artificial light source that are often used in a studio setting. These powerful strobes can be used to produce bright and consistent light for indoor spaces and add special highlights to an image. Studio strobes also come with wireless triggers and remotes, making them very versatile when shooting multiple subjects.
Conclusion
Working with artificial light sources can be a great way to expand your photography and create stunning images. With the right knowledge, you can take full advantage of the range of lighting techniques available to you. We hope this guide has shown you some of the key elements of shooting with artificial light sources, such as light modifiers, speedlights, and studio strobes.
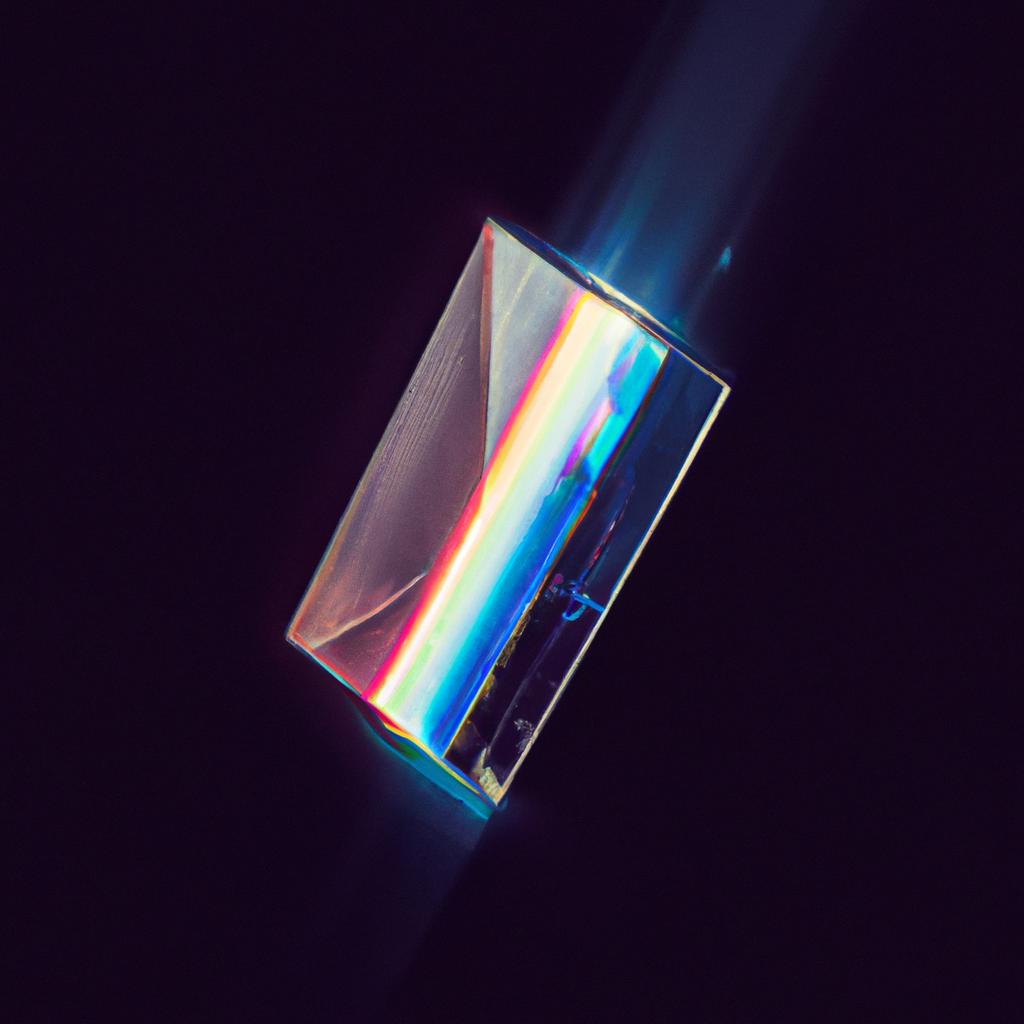
Reflection and Fresnel Lights
Reflection and Fresnel lights are two of the most important lighting techniques used in photography. Reflection lighting is when light is reflected off of a large surface, such as a wall or a special reflector, to create a bright highlight on the subject’s face or body. Fresnel lights are powerful and adjustable spotlights that allow you to direct the focus of the light on the desired subject.
Reflection lighting is often used as a fill light to bring out details in the shadows and add a soft and even look to the overall image. It can also be used to create a dramatic effect on the subject’s face or body. Fresnel lights tend to be more powerful and focused than reflection lights, allowing you to direct the bulk of your light source onto the subject to create an intense lighting effect.
Working with both reflection and Fresnel lights requires practice and patience. To get the best results it is important to understand how the light will interact with the subject. For example, if you are aiming for a dramatic look, you need to be aware of the angles of the light and how the light will affect the subject’s features.
By understanding the basics of how to use reflection and Fresnel lights, you can take your photography to the next level and create stunning images that will make your work stand out from the rest.
Color Temperature and White Balance
Understanding color temperature and white balance is essential to obtaining stunning images with the proper lighting. Color temperature is measured in degrees Kelvin, and is the amount of warm or cool light your camera is capturing. Every light source emits its own color temperature, which will change the look of your final photo. White balance is how your camera compensates for different light temperatures, ensuring that colors in your image appear as you intended.
If you want colors in your image to look natural, then you have to make sure the white balance is accurate. There are a few ways to do this: you can set your camera’s white balance to the specific light conditions, or you can leave it in auto mode and let the camera adjust accordingly. You can also manually correct the white balance of an image in photo editing software later on.
Your choice of lenses will impact how you capture light. Wide-angle lenses will capture more light and bigger sources than telephoto lenses, which are ideal if you’re looking to capture small light sources. Zoom lenses are in between these two and offer the most flexibility.
Lens Choices for Lighting
Choosing the right lens when utilizing lighting in photography is very important. Different lenses can create different effects or capture light in different ways. Here are some of the lens types you may consider for your lighting set-up:
- Wide Angle Lenses – Wide angle lenses are used to capture a wider perspective and is suitable for capturing larger scenes. This type of lens also helps to reduce distortion.
- Telephoto Lenses – Telephoto lenses are used to capture distant subjects or details from far away. They are also commonly used for portrait photography.
- Macro Lenses – Macro lenses are used to capture close-up images of small objects. This type of lens will allow you to capture incredible detail.
When selecting a lens, pay attention to the aperture size as well. Aperture size determines how much light is captured by the lens, and a higher f-stop number indicates that less light is allowed in. Pay attention to the maximum aperture size of the lens to ensure that you have enough light in your photograph.
Setting Up the Photograph for Effective Lighting
Lighting is essential in photography. Achieving the desired lighting conditions can be difficult, but there are a few things that can be done to ensure a good result. To make the most of your light sources, it is important to take some time to prepare the shot by setting up your photograph correctly.
Position your camera in a way that will allow you to utilize any available natural light to its fullest effect – e.g. if you are shooting indoors, place your subject next to a window. If you are shooting outside, take into consideration the time of day and angle of the sun.
Once you have chosen the right location and angle for your photograph, consider the types of light sources you will use. Natural light is great for certain scenarios, but it may not always give you the best results. In these instances, artificial light sources will be necessary. Position the light sources in a manner that will best light your subject and create the desired effect.
Last but not least, consider the background of your photograph. A good background can help accentuate the subject by providing context and enhancing the composition. Ensure that the background doesn’t overpower the subject – it should be used only as a complementary element.
By properly setting up your photograph, you can maximize your lighting options and achieve stunning photographs.
Working with Light Meters
Using light meters is an important part of creating stunning photographs. They are used to measure the intensity and brightness of light sources, allowing you to compare them and get the desired results in your images.
Light meters work by measuring the visible light that is reflected off the object or scene. They typically come in two forms: reflective light meters and incident light meters. Reflection light meters measure the intensity of light that is reflected off a white card that is placed in front of the light source, while incident light meters measure the intensity of light that is hitting a subject directly.
Using a light meter is fairly easy, but it will require some practice as you become more familiar with how it works. To use a light meter, hold the device up to the light source, turn it on, and take a reading. The reading will indicate the intensity of light for that particular source. Then, you can adjust the light power or settings to obtain the desired effect.
By using a light meter, you’ll be able to easily adjust the intensity of light sources and achieve amazing results in your photos. It’s a great tool that any photographer should have in their arsenal.
Camera Settings to Enhance Lighting
Using the correct camera settings is an important part of capturing stunning photos with great lighting. A great starting point is to set your camera to a low ISO, around 100-400, and select a shutter speed that produces the desired exposure. Aperture priority mode is a common setting when capturing images in different lighting situations. You’ll also want to consider using either spot or center-weighted metering, depending on the style of photography you’re trying to create.
When shooting outdoors, take into account the direction, intensity, and color of the light when selecting the appropriate exposure metering settings. If the sun is directly in the frame, you may want to look at other camera settings such as exposure compensation, white balance, and auto bracketing to help ensure you’re capturing the right colors. When photographing indoors, select the appropriate flash sync speed name or slave mode, depending on the type of light source you are using.
To ensure a properly exposed photograph every time, consider investing in a light meter which will allow you to accurately measure the amount of light present in each frame and adjust your settings accordingly. Be sure to experiment and practice different camera settings and techniques so that you can get the most out of your lighting for stunning photography.
Tips & Tricks for Working with Lighting in Photography
When it comes to photography, lighting is one of the most important elements. Taking the time to get the right lighting can make a huge difference in the outcome of your photos. Here are some tips and tricks to help you get the best possible results from your lighting:
- Experiment – Don’t be afraid to play around with different light sources and settings. Seeing how different lighting looks on your subject is a great way to become familiar with the various ways light can affect a photo.
- Balance Your Light – When working with multiple light sources, try to balance the light across your subject. This will make sure that your entire image looks even and professional.
- Natural Light = Free Light -Be sure to take advantage of natural light whenever possible. Natural light can be just as effective and beautiful as artificial light, but it won’t cost you a dime.
- The Sun Is Your Friend – Don’t be afraid to shoot during the day. The sun can provide some beautiful and unique lighting effects, depending on the time of day and location.
- Diffuse Direct Light – Hard light can be overpowering and create harsh shadows. Whenever possible, diffuse hard light by placing a translucent material over the light source or utilizing indirect lighting.
- Black & White – Don’t forget about black and white photography. Using monochromatic lighting setups can create stunning images with dramatic contrast.
These tips and tricks should help you explore different lighting techniques to create stunning photography. Always remember to experiment with different light sources and settings, as each situation is unique. With practice and patience, you will soon master the art of working with light.
Exploring different lighting techniques is a fantastic way to take stunning photographs. With the right knowledge and understanding, working with various sources of illumination can help photographers to capture dramatic images with beautiful light, depth, and contrast. In this guide, we have discussed a range of natural and artificial lighting techniques, looked at lens choices and camera settings, and ended with some useful tips and tricks for taking striking photographs. With practice, you will soon be able to control and manipulate light to create dramatic and unique effects in all your photographs.
comments: 0
